How to Build a Backyard Sauna: Complete Guide
Table of Contents
- Planning Your Backyard Sauna Size and Layout
- Choosing a Location in Your Backyard
- Backyard Sauna Plans and Design Selection
- Outdoor Sauna Materials List and Inventory
- Building the Foundation and Base Frame
- Framing, Walls, Roof, and Assembly
- How to Insulate a Sauna and Install Ventilation
- Backyard Sauna Cost Breakdown and Budget Planning
- Frequently Asked Questions
Last Updated: October 9, 2026
Planning Your Backyard Sauna Size and Layout
To build backyard sauna projects successfully, start with a clear plan. Size and layout determine whether it fits your space, budget, and wellness goals. At Luxure Saunas, we help homeowners choose the right dimensions.
Most backyard saunas hold 4 to 6 people. A 4-person sauna measures around 6 by 6 feet; a 6-person model stretches to 8 by 8 feet or uses a barrel design. The choice depends on three factors:
- Available space - Measure carefully and account for clearance for maintenance and airflow.
- User count - Plan for your typical group size, not maximum capacity.
- Budget - Larger saunas cost more; a 4-person unit still delivers the full sauna experience.
Layout matters as much as size. Position your sauna where it won't block views, pathways, or drainage, and consider sun exposure, afternoon shade keeps operating costs down in summer. A sauna 20-30 feet away feels accessible; 50 feet away feels isolated.
Choosing a Location in Your Backyard
The right location makes or breaks your sauna experience. A poorly placed sauna becomes an eyesore and a maintenance headache. A well-placed one becomes a natural gathering spot.
Check zoning rules and setback requirements first. Many jurisdictions require structures to sit 5 to 10 feet from property lines, and some require permits.
Ground conditions matter significantly. Avoid low-lying areas where water pools after rain. Sauna floors need drainage. Standing water rots wood and creates mold. Look for level or slightly sloped ground that drains naturally away from the structure.
Sun and shade balance operating costs: full summer sun makes your heater work harder, while dappled afternoon shade keeps interior temperatures manageable.
Wind exposure affects comfort and efficiency: a sauna in a wind tunnel loses heat faster. If your backyard is exposed, position the sauna to block prevailing winds, or plan a windbreak using landscaping or fencing.
Access and visibility shape how often you'll use it. A sauna tucked behind the garage gets forgotten; one visible from your kitchen or patio invites regular use.
Backyard Sauna Plans and Design Selection
The design you choose sets your entire build backyard sauna project. Three types dominate backyard installations: square saunas, barrel saunas, and custom-built frames.

Square saunas offer simplicity and efficiency. They maximize interior space for a given footprint, and their flat walls make assembly logical. Most kits use this design because it's easiest to package and ship.
Barrel saunas deliver classic aesthetics and wood efficiency. The curved design sheds water naturally and needs less roofing material. They're slightly harder to assemble than square models but worth the effort.
Custom-built frames give maximum flexibility but demand carpentry skills and time. You source materials individually and build from scratch, costing more in labor but letting you match your home's architecture exactly.
For most homeowners, a kit-based approach makes sense. Kits arrive with pre-cut lumber, hardware, and instructions, eliminating guesswork about material quantities and wood quality. Luxure Saunas offers square and barrel kits in 4-person and 6-person sizes, crafted from Canadian hemlock and red cedar.
When selecting a design, consider:
- Assembly time - Kits take 8-16 hours with two people. Custom builds take weeks.
- Customization - Kits offer limited options. Custom builds adapt to your exact vision.
- Cost predictability - Kits have fixed pricing. Custom builds often exceed estimates.
- Resale value - Quality kit saunas hold value. Custom builds depend on craftsmanship.
Outdoor Sauna Materials List and Inventory
A complete materials list prevents mid-project delays and waste. Gather the full inventory your sauna design requires before ordering.
Structural lumber forms the skeleton. Most quality saunas use 1.5-inch-thick cedar or hemlock for walls. Avoid pressure-treated lumber, chemicals leach into sweat and heat.
Roofing materials protect everything below: underlayment, shingles or metal roofing, and flashing.
Hardware and fasteners must resist corrosion. Stainless steel bands, hinges, and bolts won't rust or stain the wood.
Insulation and vapor barriers prevent heat loss and moisture damage.
Interior cladding covers insulation and creates the finished look.
Benches and seating need sturdy construction. Avoid pressure-treated wood. Benches typically sit at two heights: lower at 18 inches, upper at 36 inches.
Flooring must drain water and resist rot. Cedar or hemlock slats spaced 1/4 inch apart let water drain while keeping feet off cold concrete.
Heater and stones complete the system. Electric heaters (6,000 to 9,000 watts) are common for residential saunas. Volcanic rocks, typically 15 kg (33 pounds), sit atop the heater.
Accessories enhance usability: a wooden bucket, ladle, thermometer, sand timer, and a shelf for towels and water bottles.
| Item | Quantity | Notes |
|---|---|---|
| Wall lumber (1.5") | 200-300 board feet | Cedar or hemlock |
| Roofing underlayment | 1 roll | Covers roof area |
| Shingles or metal roofing | Per roof area | 20-40 squares typical |
| Stainless steel fasteners | 5-10 lb | Bolts, bands, hinges |
| Vapor barrier | 500-800 sq ft | Polyethylene film |
| Interior cladding | 150-200 board feet | Cedar or hemlock |
| Insulation | 200-300 sq ft | Closed-cell foam |
| Bench lumber | 50-75 board feet | Aspen or poplar |
| Flooring slats | 75-100 board feet | Cedar or hemlock |
| Heater | 1 unit | 6,000-9,000W electric |
| Sauna stones | 15 kg | Volcanic rocks |
Building the Foundation and Base Frame
A solid foundation prevents settling, rot, and structural failure. Most backyard saunas rest on concrete pads or gravel bases.
Concrete pad method works best for permanent installations. Dig a 4-6 inch hole, pour concrete, and cure it for 7 days. The pad must slope slightly (1/8 inch per foot) for drainage. This method lasts decades and keeps wood off wet soil.
Gravel base method suits temporary or semi-permanent setups. Excavate 6-8 inches, compact the soil, and spread 4 inches of crushed gravel over landscape fabric to prevent weeds. Gravel drains well but needs occasional raking.
Once your base is ready, frame the floor. Pressure-treated lumber (2x8 or 2x10 joists) forms the perimeter. Space joists 16 inches apart. Attach them with galvanized bolts or stainless steel fasteners. Never use nails, they corrode and loosen over time.
Lay wooden floor slats across joists, spaced 1/4 inch apart, so water drains while feet stay dry. Cedar or hemlock slats resist rot better than softwoods; sand them smooth before installation.
6-Person Indoor/Outdoor Square Sauna, Patchwork Red Cedar Traditional Sauna Kit →
With a concrete base, bolt the frame directly to the concrete using anchor bolts to prevent shifting from frost heave or settling.
Framing, Walls, Roof, and Assembly
Wall framing transforms a base into an enclosed space. Most kits use pre-cut lumber that fits together like puzzle pieces.
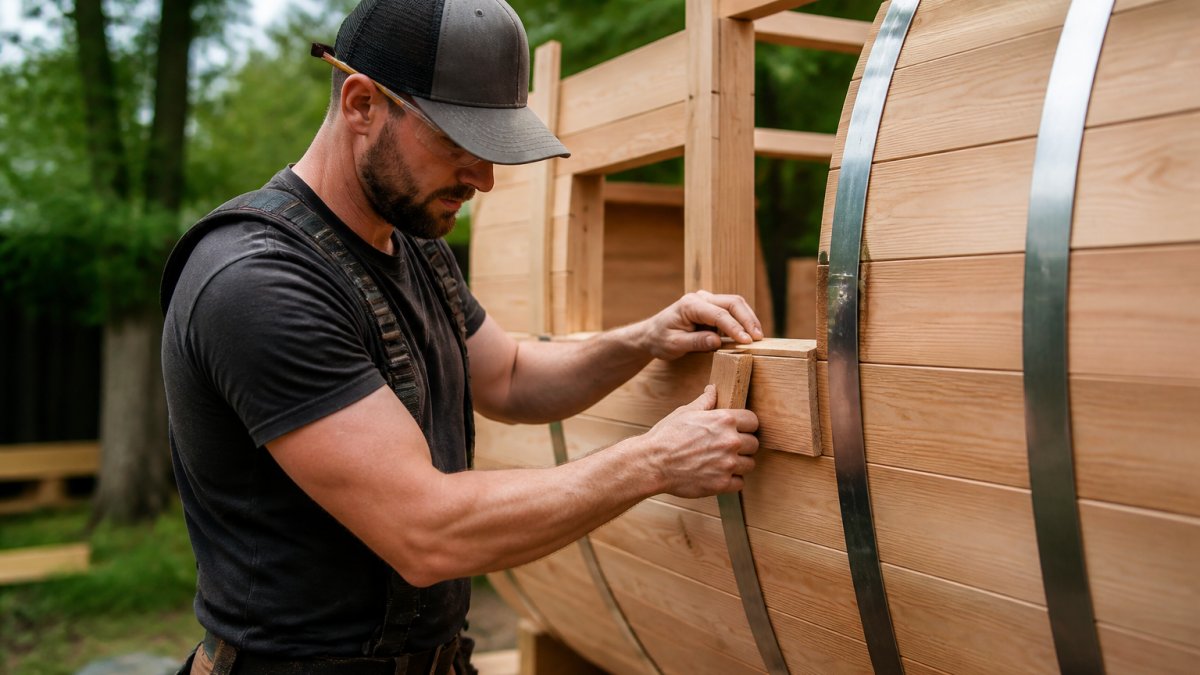
Lay out wall sections on a flat surface and connect vertical studs to horizontal plates using stainless steel bolts.
Raise walls one at a time, starting with the back wall. Have a helper hold it plumb while you bolt or screw through the base plate into the foundation.
Brace walls temporarily with diagonal supports until the roof is installed to prevent racking (twisting) during assembly.
Install the roof frame next.
Sheath the roof with plywood, then add underlayment and shingles or metal roofing.
Once the roof is watertight, install interior cladding.
Door installation comes next. Most saunas use a single outward-swinging tempered glass door, which lets light in and lets you see inside without opening it.
How to Insulate a Sauna and Install Ventilation
Insulation keeps heat inside and cold outside. Ventilation manages moisture and prevents mold.
Install insulation between the interior cladding and the outer wall frame. Closed-cell foam (1.5 to 2 inches thick) provides roughly R-7 per inch.
Before installing insulation, add a vapor barrier to the outer wall surface. Polyethylene film (4-6 mil) stops moisture from entering the wall cavity; staple it to the frame, overlapping seams by 6 inches.
Ventilation prevents humidity from reaching dangerous levels. Install intake vents near the floor and exhaust vents near the ceiling, sized for your sauna volume:
- 4-person sauna: 6-inch intake, 6-inch exhaust
- 6-person sauna: 8-inch intake, 8-inch exhaust
Larger vents move more air without creating drafts. Install dampers on both intake and exhaust: keep them slightly open during use, then fully open for 30 minutes afterward to dry the interior.
A small exhaust fan (200-300 CFM) in the exhaust vent, wired to a timer, speeds drying after sessions.
Backyard Sauna Cost Breakdown and Budget Planning
Total cost for a DIY backyard sauna ranges widely based on size, materials, and whether you build from scratch or use a kit.
Kit-based approach (most common):
- 4-person kit: $5,500-$6,000
- 6-person kit: $6,500-$8,500
- Heater (if not included): $1,500-$2,500
- Permits and inspections: $200-$500
- Labor (hiring help for assembly): $1,000-$2,000
- Total: $9,000-$13,500
The U.S. Department of Energy provides guidance on home improvement cost planning and energy efficiency considerations for outdoor structures.
Custom-built approach (maximum control):
- Lumber and materials: $3,000-$5,000
- Heater and controls: $2,000-$3,500
- Hardware and fasteners: $500-$800
- Insulation and vapor barrier: $800-$1,200
- Permits and inspections: $300-$600
- Labor (if hired): $3,000-$6,000
- Total: $10,000-$17,000
Operating costs depend on heater type and usage.
Maintenance costs are minimal: budget $200-$500 annually for wood sealant, hardware replacement, and roof repairs.
According to the National Association of Home Builders, outdoor wellness structures represent one of the highest-return home improvements for buyer satisfaction and long-term value retention.
To reduce costs:
- Buy kits during off-season (fall/winter) for discounts
- Handle assembly yourself rather than hiring labor
- Choose hemlock instead of cedar to save 10-15%
- Install a smaller 4-person sauna instead of 6-person
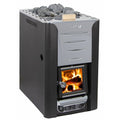
- Use a wood-fired heater instead of electric (lower operating costs over time)
For homeowners seeking premium, durable construction without the DIY complexity, Luxure Saunas offers pre-assembled kits that arrive ready for final installation. The Better Business Bureau recommends verifying warranty terms and manufacturer reputation before purchasing outdoor wellness equipment.
Our 6-person barrel sauna with Canadian hemlock costs $6,259 and includes the heater, rocks, and all accessories. Our 6-person square sauna in patchwork red cedar runs $7,899 with a 9000W heater. These options eliminate guesswork about material quality.
Building a backyard sauna transforms your home into a wellness sanctuary. The process takes planning, patience, and attention to detail, but the payoff is years of relaxation.
Frequently Asked Questions
Do I need a permit to build a sauna in my backyard?
Permit requirements vary by local jurisdiction, building codes, and zoning regulations. Many areas require permits for permanent structures, electrical installations, and structures over a certain square footage. Contact your local building department before starting construction. If your sauna uses an electric heater requiring a 240V circuit, a licensed electrician must install it to meet electrical codes. Some homeowners use prefab sauna kits to simplify the permitting process, as manufacturers often provide documentation supporting code compliance.
How much does it cost to build a backyard sauna?
A DIY backyard sauna kit ranges from $5,499 to $8,259, depending on capacity and materials. The 4-person barrel sauna starts at $5,499, while a 6-person square sauna costs $7,899 to $8,259. Costs include the sauna structure, heater, benches, rocks, and accessories. Additional expenses include site preparation, foundation materials, electrical work (if required), and permits. Budget for labor if hiring professionals for assembly or electrical installation, which can add $1,000 to $3,000 depending on complexity.
What materials do I need to build a backyard sauna?
A traditional backyard sauna requires Canadian hemlock or red cedar for the structure, a heater (electric or wood-burning), volcanic rocks, benches, tempered glass door, stainless steel hardware, roof underlayment and shingles, and a wood floor base. For the foundation, you'll need gravel, concrete blocks, or a concrete pad. Insulation materials include vapor barrier and interior cladding. Many DIY builders choose prefab kits that include all structural components, simplifying the materials list and ensuring compatibility between parts.
How long does it take to build a backyard sauna?
Assembly time depends on the kit and your experience. Most prefab sauna kits require 8 to 16 hours of assembly with at least 2 people, spread across several days. Site preparation, including foundation work and electrical installation, can add 2 to 5 days. Total project duration typically ranges from 1 to 3 weeks when accounting for site prep, assembly, electrical work, and finishing touches. Hiring professionals for electrical and foundation work may speed up the timeline but increases overall cost.