How to Maintain an Outdoor Cedar Sauna: 2026 Guide
Table of Contents
- How to Build a Cedar Sauna Maintenance Schedule That Works
- Routine Cleaning: How to Clean an Outdoor Cedar Sauna Interior
- Exterior Wood Protection: Sealing and Finishing Cedar
- Choosing the Best Wood Cleaner for Cedar Sauna Surfaces
- How to Sand Sauna Benches and Restore Wood Grain
- Preventing Mold, Mildew, and Moisture Damage
- Winterizing and Troubleshooting Common Cedar Issues
- Frequently Asked Questions
Last Updated: September 20, 2026
How to Build a Cedar Sauna Maintenance Schedule That Works
A cedar sauna rewards consistent care, and the biggest mistake owners make is treating maintenance as a seasonal event rather than a routine. A weekly, monthly, and annual rhythm keeps wood stable, benches hygienic, and heating components efficient.
Weekly, Monthly, and Annual Tasks
The most effective cedar sauna maintenance schedule splits work by frequency. Weekly tasks take under 15 minutes; monthly and annual jobs add deeper protection.
| Frequency | Task | Time Needed |
|---|---|---|
| After each use | Wipe benches, leave door open to dry | 2-3 minutes |
| Weekly | Sweep floor, vacuum debris, air out | 10-15 minutes |
| Monthly | Wash benches and duckboards, inspect wood | 30-45 minutes |
| Annually | Deep clean, sand if needed, reseal exterior | 3-5 hours |
Routine Cleaning: How to Clean an Outdoor Cedar Sauna Interior
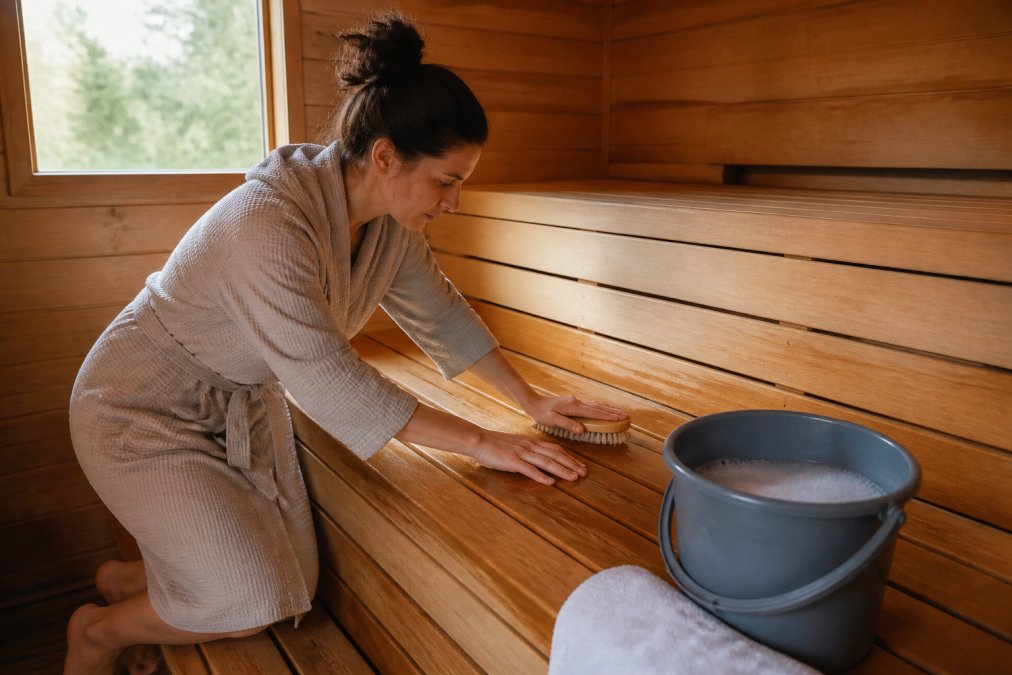
Cleaning an outdoor cedar sauna interior starts with dry removal before any water touches the wood. Sweep or vacuum loose debris, then wipe with a damp cloth and mild soap. Never soak cedar, excess water raises the grain and encourages mildew in the joints.
Cleaning Sauna Benches and Duckboards
Benches and duckboards collect the most sweat and skin oils. Remove duckboards and backrests, scrub them outdoors with warm water, mild soap, and a soft brush, then rinse lightly and dry fully in the sun before returning them.
Removing Dirt, Debris, and Sweat Stains
Sweat stains and tannin bleeding respond best to a dedicated wood cleaner rather than household bleach. Apply with a hand brush along the grain, then wipe with a clean damp cloth. For stubborn patches, repeat rather than scrubbing harder, which flattens the grain.
Exterior Wood Protection: Sealing and Finishing Cedar
Exterior wood protection comes down to choosing a breathable finish and reapplying it before the wood dries out. Cedar resists rot, but UV light and rain break down its surface; a penetrating sealant slows that process without trapping moisture inside.
Prep Work Before You Seal
Sealing is only as good as the surface under it. Work through these steps in order:
- Clean first. Remove dirt, pollen, and gray surface fiber with a cedar-safe wood cleaner and a soft-bristle brush. Rinse with a damp cloth, not a hose, and let the wood dry 24 to 48 hours.
- Strip failed finish. If old sealant is flaking or peeling, remove it with a wood-safe stripper or light sanding along the grain. Sealing over a failing coat guarantees the new coat fails with it.
- Sand bare or rough spots. Use 80- to 120-grit paper on weathered areas, then 120- to 150-grit to blend. Always sand with the grain.
- Brighten if needed. Cedar that has gone silver-gray from UV exposure may need a wood brightener (often oxalic-acid based) to restore tone before sealing. Brighteners are not cleaners and should be used only on bare, unsealed wood.
- Tape off hardware. Cover metal hinges, handles, and heater components so finish doesn't bond to them.
Water-Based vs. Oil-Based Sealants for Cedar
Water-based and oil-based sealants behave differently on cedar; the right choice depends on your climate and how much color change you want.
| Sealant Type | Drying Time | Appearance | Best For |
|---|---|---|---|
| Water-based | Fast (hours) | Clear, low odor | Humid climates, easy reapplication |
| Oil-based | Slow (days) | Richer tone, deeper penetration | Dry climates, longer intervals |
How Often to Reapply
There is no single correct interval, because sun exposure, rainfall, and finish type all move the number. The practical test is water beading: pour a little water on a horizontal surface. If it beads and rolls off, the finish is still working. If it soaks in and darkens the wood within a minute or two, it's time to recoat. Check in spring and late summer.
What to Avoid
- Pressure washing. It drives water into the grain and erodes the soft earlywood, leaving a permanently fuzzy surface.
- Silicone-based sealers. They can trap moisture and make future recoating difficult because nothing else bonds to them.
- Sealing the interior. Interior sauna wood is meant to stay bare so it can breathe and release moisture. Sealant inside the hot room can off-gas when the heater runs.
- Sealing over mold. Kill and remove mold first with a cedar-safe cleaner, then let the wood dry completely before any finish goes on.
Choosing the Best Wood Cleaner for Cedar Sauna Surfaces
The best wood cleaner for cedar sauna surfaces is a pH-neutral, non-toxic formula designed for softwoods, not a general-purpose household cleaner. Cedar is a softwood with high tannin content, and harsh alkaline or acidic cleaners strip its natural oils and cause graying.
How to Sand Sauna Benches and Restore Wood Grain
Sanding sauna benches restores smooth wood grain when the surface feels rough or stained. Use fine-grit sandpaper, around 120 to 220 grit, and sand lightly along the grain. Heavy sanding removes too much material and shortens the bench's life.
Outdoor 4-6 Person Black Square →
Preventing Mold, Mildew, and Moisture Damage
Mold prevention depends on air circulation and moisture control, not chemical treatments. After every session, open the door and any vents; if your sauna sits in shade, add a small fan.
Winterizing and Troubleshooting Common Cedar Issues
Most cedar sauna guides stop at cleaning. The two areas they skip are cold-weather protection and diagnosing cedar-specific problems, exactly where an outdoor sauna takes the most damage.
Winterization for an Outdoor Cedar Sauna
Freeze-thaw cycles are harder on an outdoor sauna than steady cold. Water that seeps into joints, floorboards, or the base expands when it freezes, then contracts, repeating all season. Over a few winters that movement opens seams, loosens fasteners, and cracks boards that looked fine in fall.
Work through this checklist before the first hard freeze:
- Seal the exterior. Apply a breathable finish while temperatures are still above roughly 50°F. A sealed shell sheds meltwater instead of absorbing it.
- Clear the roof and check snow load. Remove leaves and debris from the roof and gutters before snow arrives. During winter, clear heavy snow with a soft-bristle roof rake rather than letting it pile up. Cedar is strong, but a barrel or cabin roof under a deep, wet snow load can deflect or crack.
- Drain or protect water lines. If your sauna has a water supply, shower, or hose bib, shut off and drain the lines before freezing temperatures arrive. Trapped water in a supply line is the most common cause of winter plumbing damage.
- Protect the heater. Follow the heater manufacturer's cold-weather guidance. Many electric sauna heaters should be disconnected or have the breaker switched off if the sauna sits unused for long stretches, and some manufacturers recommend removing the stones so trapped moisture doesn't freeze against the elements.
- Check the door and seals. A door that no longer closes flush lets snow and cold air in. Adjust hinges and replace worn gaskets before winter, not after.
- Elevate and dry the floor. Lift duckboards off the floor so air can move underneath. Standing water that freezes on the floor is a leading cause of cracked floorboards.
- Ventilate on mild days. Even in winter, open the door and vents for 15 to 30 minutes on a dry, mild day to let trapped moisture escape. A sealed-up sauna grows mildew faster than a cold one.
- Keep the exterior clear. Don't pile snow against the walls or base. Snow contact keeps the wood wet and accelerates rot at the bottom edge.
Troubleshooting Common Cedar Issues
Cedar problems usually have a specific cause, and matching symptom to fix saves you from sanding or resealing wood that doesn't need it.
- Gray, faded wood: UV exposure. This is surface-level, not structural. Sand lightly along the grain with 80- to 120-grit paper, then reseal with a breathable finish.
- Black spots or dark streaks: Mildew or mold from trapped moisture. Clean with a cedar-safe cleaner, improve ventilation, and check that water isn't pooling behind benches or under duckboards.
- Sticky residue or amber drips: Sap bleeding from heat. Wipe with a cloth dampened with mineral spirits, then let the surface dry. Sap bleeding is most common in the first year or two and usually fades as the wood seasons.
- Tannin bleeding (brown streaks that run down the wood): Cedar's natural tannins dissolve in water and stain the surface. This is cosmetic, not damage. Clean with a cedar-safe wood cleaner, avoid soaking the wood, and reseal once the surface is dry.
- Water spots or rings: Usually from a wet cloth, a leak, or condensation dripping from the ceiling. Fix the moisture source first, then lightly sand and blend the area.
- Cracks along the grain (checks): Normal seasonal movement as the wood expands and contracts. Small checks are cosmetic. Deep splits near structural joints, bench supports, or the door frame should be repaired before they widen.
- Fuzzy or raised grain: Excess moisture from cleaning or pressure washing. Let the wood dry fully; if the fuzz remains, sand lightly with 120- to 150-grit paper along the grain.
- Loose or squeaking benches: Tighten stainless steel fasteners. If a support has cracked, replace the board rather than forcing a warped piece back into place.
Structural Repair Basics
Structural repair is worth doing early, before small problems become expensive. Loose bench supports, cracked duckboards, and gaps at the door frame let heat escape and moisture in. Replace damaged boards with matching cedar, and re-tighten stainless steel fasteners rather than forcing warped wood back into place. Use stainless or corrosion-resistant hardware; standard steel fasteners rust quickly in a humid sauna and stain the wood.
Winter damage and cedar problems almost always trace back to moisture in the wrong place. Seal the exterior, drain water lines, keep snow off the wood, and ventilate on mild days. Those four habits prevent more damage than any repair.
Frequently Asked Questions
How long will a cedar sauna last outside?
A well-maintained outdoor cedar sauna can last 15 to 30 years or more. Cedar naturally resists rot, insects, and moisture damage, but its lifespan depends on regular care: cleaning benches after each use, maintaining ventilation, and applying a breathable sealant every 1 to 2 years. Models like the 6-Person Indoor/Outdoor Square Sauna from Luxure Saunas use Canadian-certified reforested patchwork red cedar, which is built for long-term outdoor exposure when properly maintained.
Do you need to seal cedar in a sauna?
Yes, exterior cedar surfaces benefit from sealing, but the interior should remain breathable. Use a water-based, non-toxic sealant on the outside to block rain and UV damage. Inside, avoid heavy sealants because they trap moisture and can release fumes when heated. Instead, focus on cleaning and occasional sanding to keep the wood grain open. This approach protects the structure while keeping the sauna safe and comfortable to use.
Can you use a pressure washer on an outdoor cedar sauna?
No. A pressure washer forces water deep into the wood grain, raises the grain, and can strip away the soft fibers that give cedar its natural durability. Instead, use a soft brush, mild soap, and warm water for routine cleaning. For stubborn stains, scrub gently by hand. If the wood looks dull or gray, sand lightly and apply a breathable exterior sealant. This preserves the cedar surface and helps prevent mold and mildew growth.
How often should you clean the interior of a cedar sauna?
Wipe down benches and duckboards after every session with a damp cloth to remove sweat and debris. Do a deeper clean with mild soap and warm water once a month. Vacuum or sweep the floor weekly to keep grit and dust from scratching the wood. If you notice dark spots or a musty smell, clean immediately and check ventilation. A consistent cedar sauna maintenance schedule keeps the wood in good condition and extends the life of your sauna.